NothingProjector 120-inch ALR / CLR screen: test / review
Nowadays projectors are dominating in the market for home cinema setups. Projector without supported ALR screen are meaningless. Look no further, this ALR screen from nothing projectors makes your setup more immersive.
Click Here To Get The Best Deal On NothingProjector
Read this ultimate review on Nothing Projector before you purchase it.
I frequently test projectors, using a consistent methodology to evaluate their strengths and weaknesses. Testing screens is a natural extension of this process, as I can use the same tools and methods.
I’ve tested a variety of screens, which has given me the perspective to better address the questions I receive. I’m currently working on a screen comparison, where I’ll share the results of my tests and offer guidance on selecting the best screen for your needs.
Where to purchase the NothingProjector
NothingProjector screens are available exclusively on the NothingProjector website. These screens are part of the BlackSeries range, with various sizes offered, all featuring the same fabric.
Click here to visit NothingProjector official website
ALR/CLR screen
Let’s return to the main topic with a review of the NothingProjector 120-inch projection screen. This is an ALR (Ambient Light Rejecting) or CLR (Ceiling Light Rejecting) screen, designed specifically to minimize ambient light interference and reflect the projector’s light directly towards the viewer. This type of screen is ideal for ultra-short-throw projectors but isn’t recommended for other projector types (while it may work, the results won’t justify the investment).
The Nothingprojector screen is constructed with thin horizontal slats angled to direct light from below towards the audience. A standard screen would reflect some light onto the ceiling, as the angle of incidence equals the angle of reflection. This is why a regular front projection screen wouldn’t be effective in this setup, as the light would be reflected in the wrong direction.
This specialized screen enables the use of a projector in a well-lit room, provided the lighting isn’t too intense or direct. However, using it in bright daylight isn’t advisable—the image will still be visible, but with a significant loss of contrast.
Mounting

Mounting a screen isn’t particularly complex, but there are a few things to consider before you begin to ensure everything goes smoothly. While it’s possible for one person to assemble the screen (as I did), it’s much slower and less convenient, especially with a screen of this size. Given my experience with assembling screens, I might be quicker, but it generally takes between 1 to 2 hours to put everything together with two people.
It’s worth noting that you’ll need plenty of space to move around the frame without bumping into walls, and you’ll also need enough room to maneuver the screen to its final position. My projection room, which measures 3 by 5 meters and isn’t empty, wasn’t large enough to assemble the screen comfortably. So, I rearranged the furniture in my living room, which offered more space. Since the screen’s frame is nearly 3 meters wide, you’ll want to have at least a meter of space around it to move freely.
The box includes the following accessories:

All the necessary mounting hardware and wall brackets are included in the box, so you’re well-equipped to get started. However, if you plan to use the wall brackets, you’ll need a few additional tools, such as a drill bit and a level, to ensure proper installation. It’s recommended to position the base of the fixture 60-80 cm from the floor, though this may vary depending on the layout of your room.
The first step in the process is to assemble the aluminum frame.
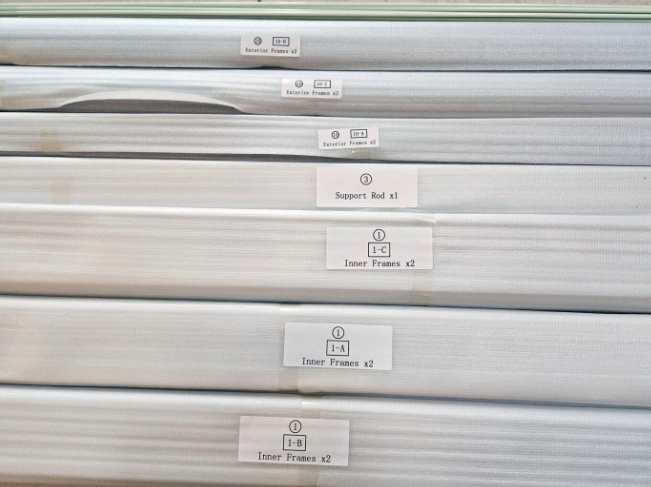
All the frame components are numbered, and the manual includes a clear diagram that shows how to assemble them, making this the simplest part of the process.
The next step is to secure the different parts together.
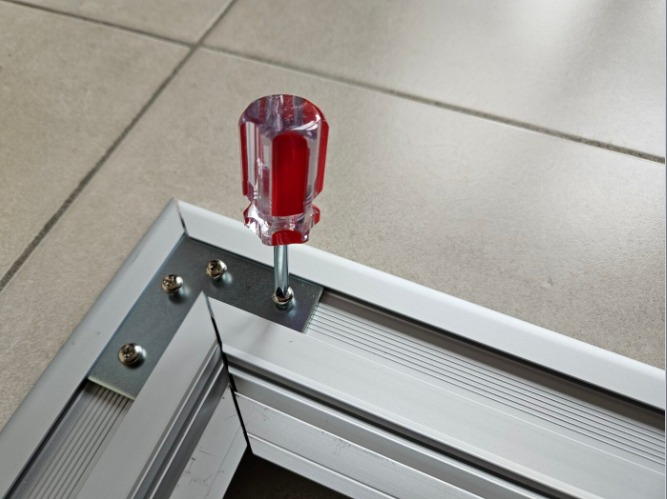
All the assembly hardware is provided in the box, including a screwdriver—actually, there are two, in case you have help assembling the screen. The fasteners tighten easily, the frame fits together perfectly, and there are no gaps at the joints.
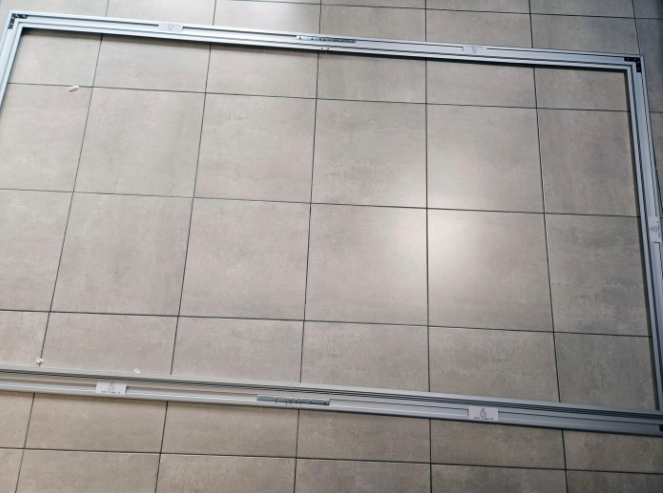
To proceed to the next step, you’ll need to lift the frame to unroll the screen on the floor and then position the frame back on top of it. This part is straightforward—the screen should be laid out on the black backing surface. The orientation isn’t critical at this point since the frame is perfectly symmetrical. Just ensure the frame is aligned within the four white corners marked on the black surface of the screen.
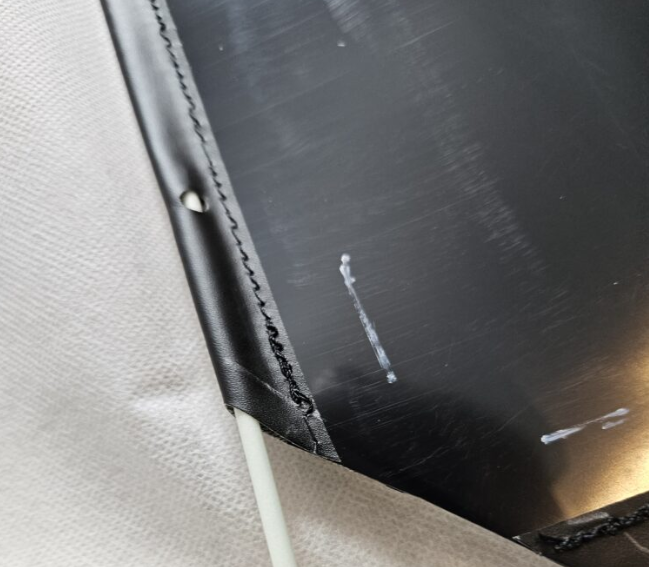
Next, slide the rods into the channels provided on the screen. There is a single rod for the vertical section, which is long enough to span the entire height. For the horizontal section, you’ll need to use two rods, ensuring that the point where they join doesn’t align with any of the holes meant for attaching a spring.
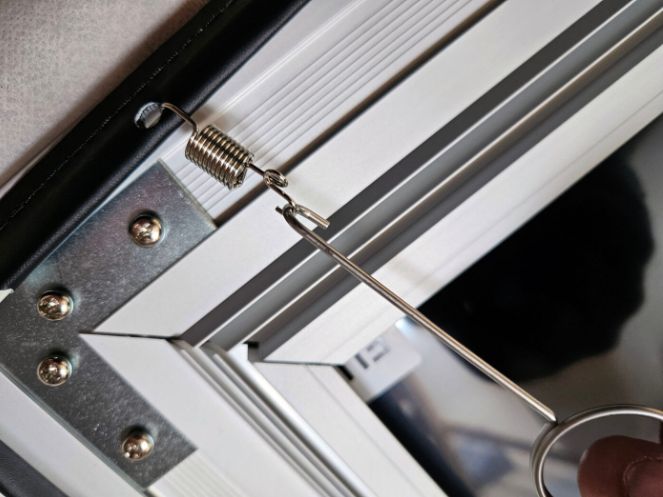
After the rods are in place, it’s time to attach all the springs. However, it’s important to do this methodically; you need to create tension gradually by alternating the sides where you attach the springs. The manual provides guidance on the process: begin with one corner, then move to the opposite corner, consistently following this pattern. This can be a lengthy process, and at times you may need to apply some force to secure the springs firmly to the frame. This step is crucial for achieving a perfectly taut screen, and it tends to be the most time-consuming part of the assembly.
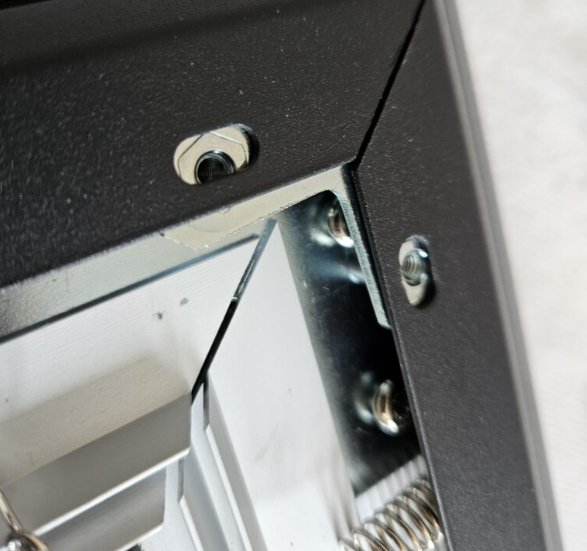
The next step involves attaching the black finishing frame around the screen. While positioning the frame is straightforward, I encountered some delays when trying to insert the fixing angles, as I struggled to get the corners of the frame to align properly. I experienced a similar issue with my first NothingProjector screen, but this version seems to be more challenging due to a slightly different attachment system. As a result, you’ll need to apply some force to the frame to minimize the gaps at each joint.
Canvas quality
I snapped several photos of the canvas from various angles and distances, and I have to say, it’s impressive. The canvas looks stunning, with no glitter effect, and the natural texture is virtually invisible during use. Even when I move to the side to view it from a different angle, I don’t observe any noticeable differences in brightness. Additionally, when I get up close, there’s no evidence of the canvas’s texture or any treatment.
Day/Night
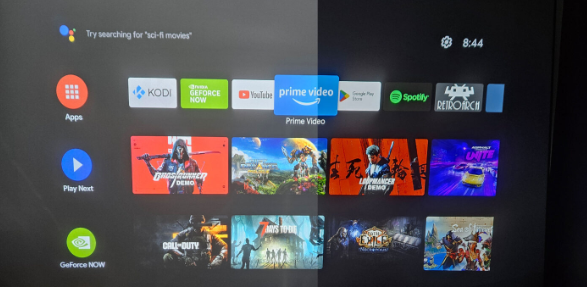
I understand that some of you might see this canvas as a solution for watching movies in bright daylight, similar to a TV. However, I must caution you that it’s not quite the same. A projector, even a high-brightness model, isn’t really meant for use in daylight. While the image is still viewable, it comes at the cost of contrast; blacks will appear gray, as shown in this image. I took this photo with the room’s LED lights on, and while everything is still legible, the blacks have turned gray.
If you’re watching something like a soccer match or Formula 1 race, the loss of contrast may not be as noticeable. However, during a film with many dark scenes, it can become difficult to see anything clearly.
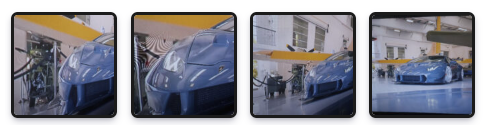
I’ve created a quick video to demonstrate what I just described. Even though the image is watchable, you can easily compare the dark areas between the two and see the contrast issue I mentioned.

Brightness test
Impact on White
I measured the luminosity reflected by this screen using a neutral surface and found a 16% decrease in brightness for white, which is perfectly normal since the gain of this screen is less than 1.
Impact on Black
For black luminosity, I observed a 36% decrease. This result is also expected and is actually quite favorable, as it indicates that while the overall brightness diminishes, the reduction is more significant in the black areas.
This variation in brightness percentage positively affects contrast, and I will elaborate on this point later in the review.
Brightness is a critical factor when selecting a projector, but it’s important to note that the advertised brightness is often overstated. In reality, actual brightness typically ranges from 50% to 70% of the advertised value. From that figure, you should subtract an additional 20% to account for the loss incurred by the screen.
Color test
To assess the screen’s color impact, I measured the primary colors at the projector’s output before they could be affected by other factors.
Impact on White
White is composed of equal parts red, blue, and green. When examining how this composition changes on the screen, I found that the proportion of red decreases by 11%, while green increases by 2% and blue rises by 6%. Screens are rarely neutral, and ALR screens tend to have a more pronounced effect on colors compared to white screens. These measurements reveal that the NothingProjector screen tends to diminish reds in favor of blues, resulting in a cooler overall image. I observed a 16% shift toward a cooler white.
All the ALR screens I’ve tested so far exhibit a similar trend, losing reds while gaining blues. Therefore, it’s advisable to adjust the projector to a warmer white balance.
Gray test
To assess the impact on grays, I employed the same method used for measuring colors. I recorded a 26% deviation from the grays produced by the projector, which is significant but can be largely corrected with white calibration. If the white balance is properly adjusted, the difference will quickly lessen.
Contrast test
The purpose of this type of screen is to direct light toward the viewers while enhancing the image depth by minimizing brightness. Therefore, the projector needs to be bright enough to accommodate some loss of brightness, and the screen treatment should also effectively promote the reduction of brightness in darker areas.
Some white screens excel at increasing overall brightness and maintaining contrast, but they often result in gray blacks, diminishing the image depth effect.
The NothingProjector screen performs exceptionally well by significantly darkening blacks while preserving the clarity of whites.
I have compared this screen to others of the same kind, and currently, the NothingProjector ranks at the top. This ranking may change over time, so be sure to check the comparison alongside this review to see if I’ve tested a better alternative.
CLICK HERE TO PURCHASE THE NOTHING PROJECTOR
Nothing Projector is a company that has been actively engaged in the development of projectors and screens for five years. They specialize in Ultra Short Throw projectors and ALR screens, collaborating with brands such as Formovie, Awol Vision, JMGO, Vividstorm, Dangbei, and Casiris.